
Earlier, I shared how we had finally sealed the cockpit sole/engine room. Well that was so last Saturday. The real action occurred on Sunday when Shawn Thur, our Diesel Mechanic, came down to finish the alignment of the engine and start the repair on the cuts that were made to remove the cutless bearing.
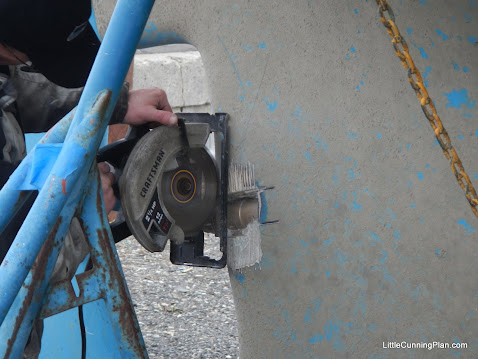
Adding insult to injury. Shawn takes a Skilsaw to the boat.
Since the work to repair the keel would require some time to allow the resin to cure, Shawn got right to work prepping the area.

Rough and Ready for the Repair
Using a Skilsaw and and a sander, Shawn roughed up the surface of the existing fiberglass with a Skilsaw. Another lesson learned. This looks like a superior preparation for laying on new material.
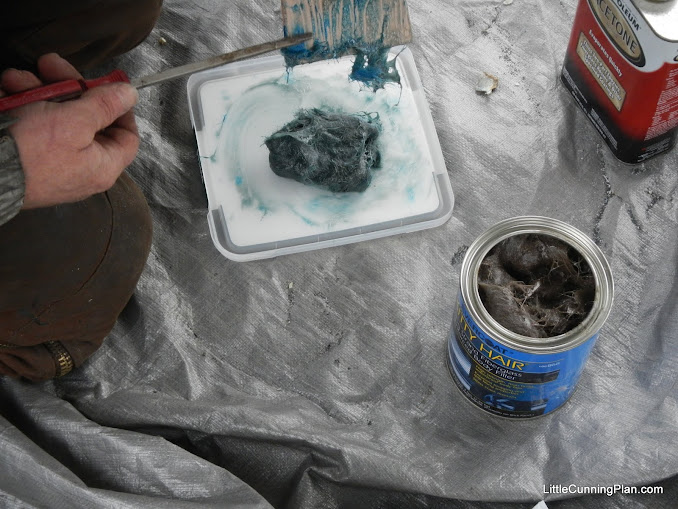
Kitty Hair. Looks like something you pull from your shower drain but is incredibly strong and versatile.
to pack in around the new nipple that houses the cutless bearing, Shawn uses a product called Kitty Hair. This is a polyester resin with long strand fiberglass mixed in. While not an epoxy resin, it is waterproof and considerably easier to use than plain resin and woven glass.

This Kitty Hair makes packing fiberglass around the new cutless bearing nipple very easy. Shawn leaves the top rough for the next layer.

A closeup of the the Kitty Hair
From what I have read so far, this product is essentially the same as what was used in during the manufacture of the boat but in a very convenient and easy to use package. Add a little cream hardener,mix and you you are ready to repair just about anything.
While the initial layers of this repair were hardening, Shawn and I went below to begin the final alignment of the engine.
The main issue with finalizing the alignment was that the ass-end of the engine needed to drop another quarter inch. To accomplish this, Shawn picked up nuts that were only half as thick as the nuts that came with the stock engine mounts. Even with these nuts, we ran down pretty close to the bottom of the feet. That is not a bad thing as it lowers the center of gravity of the engine and applies less torque to the engine mount studs.

These nuts are half the thickness of the stock nuts.
Once Shawn had replaced the leveling nuts, he could then finish aligning the engine coupling to the shaft coupling. I don’t have any photos of that alignment as Shawn was hogging all the space. But he was making noises that sounded positive. Using a dial micrometer with a magnetic base, he had me slowly turn the shaft to check the alignment. By the time he was done, the shaft was within 1/1000 of an inch. With that kind of tolerance, finishing up the coupling was pretty easy. This coming weekend, I want to at least lay hands on these nuts and bolts to make sure I am clear on how they are adjusted. I think a lick of paint on some of these parts wouldn’t go amiss. The feet are not stainless and the engine coupling was already showing rust spots even though it looked like stainless.
I think Shawn was ready to fire up the engine after all of this work was done but I have only roughed in the electrical and fuel systems to the engine. That will be priorities one and two when I get to Astoria this week end. I also have new parts for the exhaust system which I hope will allow me to finish that project.
Shawn is proposing that we pull the impeller from the raw water pump and run the engine for a few minutes with just the fresh water recirculating for a few minutes. On the hard, I have no readily available freshwater which I could use to run the raw water pump. The yard is persnickety about folks using water on their boats lest we start flushing copper paint into the Columbia River. I was thinking that I could dump 30 or so gallons into the bilge and use that for my raw water supply. Thoughts, anyone?
Finally, I’ll leave you with this beautiful photo of the new prop. This was hung on the new shaft to facilitate the alignment.

Shiny

Beautiful new prop.
I have the old prop which I plan to have cleaned, balanced and saved as a spare. It may not be as structurally able as this baby, but it will be a nice backup.
Cool blog post….the Kitty Hair looks like the ‘cat’s meow’ of fiberglass repair supplies.
I know a repair in progress can look scary but the roughed up shot prior to application of the Kitty Hair gave me heart palpitations. I am looking forward to seeing the “after” shots because the during ones are making me a little whoozy.
You’re in good company, Cidnie. I love seeing the progress being made but I wont breathe easy until this fiberglass is repaired. Still, it was necessary and gives us good experience in being strong in the face of serious repairs. Not for the faint of heart.
I think I caught a hair ball just looking at the kitty hair. lol
Looks good.
Looking good but prop holding nuts as photographed are backwards. Thin one on first. It might seem counter intuitive at first but more info here http://www.passagemaker.com/channels/propeller-nut-myth-busting/
Are the prop, shaft and log protected by an anode elsewhere as there doesn’t seem to be room for one on the shaft?
Thanks for the blog, cheers.
Thanks for the link Al. The prop isn’t actually fully installed yet. Shawn just put it on to aid in aligning the shaft to the engine. The weight of the prop at the end of that long lever arm would make a difference in the vertical alignment plus it made a nice steering wheel for turning the shaft. The nuts are just on hand tight but I will mention the point of the article.
The zinc is placed on the end of the shaft on a bronze cone built for the purpose. With less than half an inch of shaft showing, there is no room for a collar zinc.
You’ve got a nice clean bilge now so that should work well. Wouldn’t want to suck up anything but water into that nice new engine.
I try not to perseverate too much on the bilge, at this point, anything that goes in there will be pretty hard to get out. Still, we will continue to be careful.