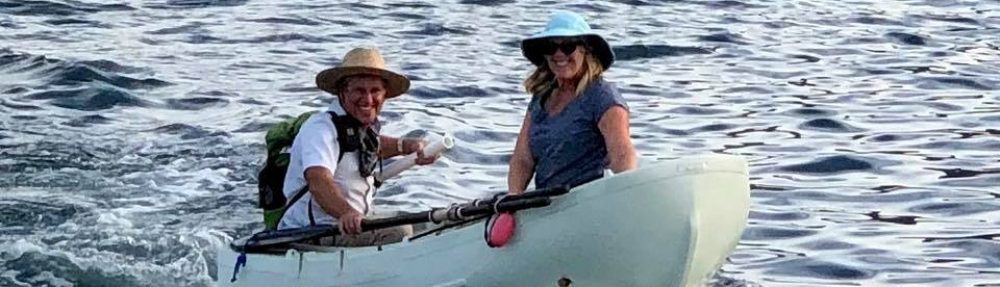
Those of us with children from the last thirty years or so will remember the book If You Give a Mouse a Cookie. I am that mouse.
I schlepped down to Astoria this past Saturday with visions of actually firing up the new engine only to bogged down in the minutia of actually providing the engine with power, fuel and a way to exhuast fumes and water outside boat. You know, important stuff.
Getting DC power to the engine was not too terrible. The act of tracing the wiring system back to the batteries and battery switch is giving me some sense of mastery over that system. But like any cookie lovin’ mouse, every contact I see must be removed, cleaned with emery paper and protected with Corrosion Block. There are a lot of battery cables on this boat. Still, my little OCD brain could not stand to see even a single electron impeded by corrosion. No Electron Left Behind!
And as long as I am cleaning cables (and removing a few) I might as well replace the old battery switch with the new Blue Seas Add-A-Battery system. We added one of these to our Cal 34 and I recommend it highly. The manual switch is essentially two single pole switches with a combine function. A voltage sensing SCR automatic battery combiner takes care of isolating the batteries when a charging source is not present but combines the batteries once the start battery indicates that it is fully charged.
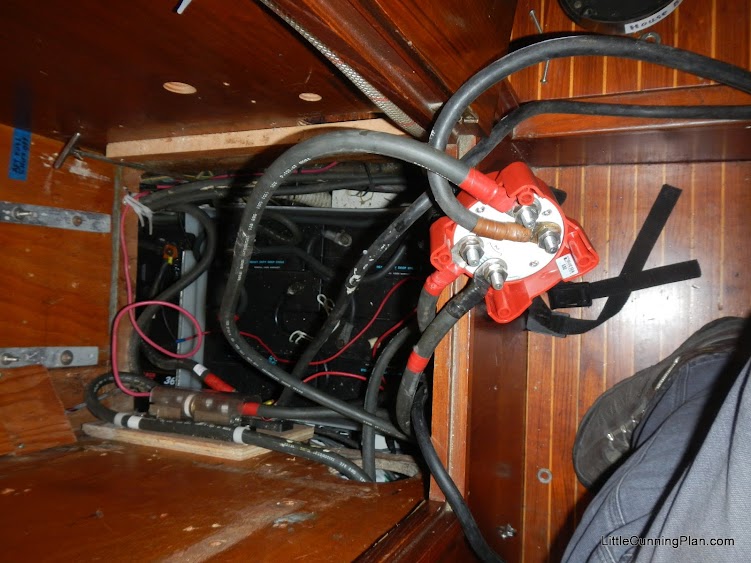
As long as I was touching the DC, I might as well install the new Add-A-Battery Switch
Currently, I cannot add the SCR because I have a traditional 8D battery for the start battery but six volt AGMs for the house bank. The AGMs are pretty close to end of life, so I will replace them with the Trojan T105s (or similar) so that I can use the same charger profile for house and start batteries.. The boat came with a Balmar voltage regulator which I intend to use as well but I haven’t included that in the current charging scheme. this mouse has quite enough cookies, thank you.

Add-A-Battery Switch installed
With the battery hooked up to the engine, I was able to celebrate the small victory of powering up the control panel.

Lights, lighting, Buzzers buzzing. The engine is almost alive.
Truth be told, I don’t really like how I laid out the power cables and will probably end up moving them. I think they represent too much of a trip hazard in the engine room. I will probably have to fabricate longer cables so that I can route them safely.
With the electrical systems sort of done, I now needed to get fuel to the system. This is another project that seems to have no end. I had the fuel filters in place but because the tanks are more than a foot below the engine, I needed to add an electric fuel pump. Add the fun of plumbing a flammable liquid to a minor electrical project and you will understand how many trips to the chandlery and Home Depot I made for this project.

More wires and hoses added to our pretty white panel. The fuel relay and override switch are in the upper left hand corner.
I wanted to be able to manually engage the fuel pump with a switch so that I could prime the system during mainentance. That meant a few extra components. I ended up putting a four inch square box on the wall to house my switch, interposing relay and any future doodads that may be needed.I still need to dress the cables and finish the final hook up, but I should be able to knock that out in an hour (laugh along with me, won’t you?)
Sunday morning in Astoria was blowing about twenty knots with gusts much higher and a a nasty, mean rain that just seemed to scream “stay inside you dolt!” I texted our diesel mechanic, Shawn Thur and told him that conditions were crummy for finishing the fiberglass on the keel. I could tell he was really upset about not being able to stand outside in a driving rain, even in a text message. But that took some pressure off of me to finish some of the other projects one of which has been going on for weeks now; the exhaust system.
I’ll spare you the complete tale of woe. Suffice to say that getting a hose from the exhaust riser to the water muffler, a distance of less than two feet, has been a challenge. In fact, that short distance is the reason for the difficulties. Anyone that has tried to bend exhaust hose will testify that two feet is not enough room to make any kind of bend. The solution? Centek fiberglass elbows. I tried to make the turns with 45 degree elbows but had to settle for 90 degree parts. In the end, the exhaust riser to muffle is almost entirely fiberglass with short pieces of rubber hose joining the the hard parts.

Frankenstein’s muffler

For the kids counting at home, that’s twelve T-bolt hose clamps.
The short distance to the muffler hopefully will mitigate the additional back pressure created by the two 90s. I expect that someone will post with a superior solution to this problem. I only ask that you be gentle.
This week may find us with a running engine but I won’t hold my breath. The weather here has been pretty crummy; lots of rain and wind but reasonably warm. Will we start the engine? Tune in next week.
Do you want the schematics for our fuel manifold? Mark did a truly brilliant job but t was time consuming so no need for me to dig those up unless you are really motivated. It solves a lot of the issues you are dealing with but again- major pain in the butt so if you want to skip it I 100% understand!
I would be very interested in Mark’s design. I visited the post http://theceolmors.blogspot.com/2012/10/gross-understatements-tacking-lessons.html and could see the drawing as well as some of the hardware. My design too has parallel Racors, but I reused the old exisiting ones. I really wanted to buy a pair of 500FG filters but my inner Scot would not allow it. If the diagram is in Visio, all the better.
The fuel pump in the post looks quite sizable. Is that a transfer pump? We have a fuel transfer system that I have a handwritten diagram for but have yet to fully understand. One fuel project at a time.
I’ll have him dig it up and email it to you- what address should I use?