It seemed that the stars were aligning to finally drop our new Beta Marine engine into Andromeda. I hit Astoria at eight in the morning this past Sunday and found our mechanic, Shawn Thur, tenderly beating the crap out of our propeller while tightening the bolts on his prop puller. Earlier, I had attempted to remove the prop with a large gear puller but succeeded only in bending the bolts on the puller. The prop is in fine condition and will be sent to Sheffield’s for cleaning and conditioning.

Now that’s a prop puller. Shawn is somewhere behind the rudder.
Finally, with the application of some heat, the prop came off the shaft and we proceeded to remove the shaft. Since we had a clear shot in the engine room, it was easy enough to pull the shaft out from inside. The shaft is about seven feet long and was clearly poorly aligned with the transmission. There was a noticeable bow to the shaft.
Warning! Graphic Images of Boat Carnage Follow!
With the prop out of the way, we could now examine the cutless bearing. I wasn’t too surprised that it was worn and that some of the rubber was actually coming away from the bronze tube. Getting the cutless bearing out of what appeared to be a continuous, six foot stern tube proved to be impossible. Our first indication of trouble was when we put a pipe wrench to the tube and the metal crumpled with very slight pressure.

That pink area is the where the zinc has been removed by galvanic corrosion over the decades. The chunks came off with just a light application of torque. This is a classic example of dezincification. That area was where the stainless steel set screw was placed.

Here is a close up of the tube taken with Melissa’s fancy camera. A great example of dezincification for future reference.
With any boat nearing 40 years of age, you have to learn how the boat was built by deduction of the facts before you. At this point, it looked like the stern tube ran continuously from the carrier bearing but, oddly, we could turn the tube exposed outside the boat without seeing the tube turn inside the boat! That meant that a coupling does exist somewhere and we could not see it. Not only that, we could turn the external piece only so far and then it would bind up. Two guys hanging off of a four foot pipe wrench would not budge it. Clearly, we were running out of options. the cutless bearing had to come out. The dezinced stern tube had to come off.

Desperate times call for desperate measures. Shawn thought that cutting off part off the stern tube would allow us to grab and remove the cutlass bearing.
With the end of the stern tube cut off, the cutless bearing still would not budge. Now we were getting into a scary place: cutting into the fiberglass so that we could expose the tube and see what the heck was going on in there. The following photos may not be suitable for young children or owners of old boats.

Shawn makes the first cut into the fiberglass. What mysteries will be revealed?

The first cut into the fiberglass finds that it is indeed all glass. no structural members to worry about. Look at the now exposed cutlass bearing. It seems a little pinkish to me which may mean it has never been replaced.

Now it becomes clear. The cutlass bearing was installed in a bronze nipple that threads onto the sterntube. The whole assembly was then glassed in.
While I am not thrilled with the extra effort and destruction required to remove the bearing and nipple, I am not terribly surprised either. The work to repair this damage will be a few hours and we will fair it as pretty as ever. The glassed area is about 4 inches by 6 inches.

The offending nipple and cutless bearing. Shawn thinks this is a fairly standard piece and should be easy to replace.
From the photo above, it might be hard to detect but this piece has a small taper to it. When we attempted to un-thread this from the stern tube, the thicker part hit the glass hull and then it would bind up.
So, armed with the old shaft, cutlass bearing and bronze nipple, shawn will head to Sheffields Marine Propeller to get parts. Of course, this forestalled the actual installation of the engine. But let us cast a last, longing glance upon this thing of beauty.

It was hard to see this drive away without dropping it into the boat. Note that we opted for the hi-rise exhaust elbow.

I like the easy control panel connector you see below the air filter housing. All engine connections are on the starboard side of the engine.
It is going to be a little awkward to get to the oil and fuel filters on the starboard side. There will be plenty of room around the engine though.

Sheffields fabricated these beautiful new rails for the engine. Sorry for the blinding whiteness of our engine room.
Shawn did drop off the engine rails and since we did not install the engine, I had the opportunity to prime and paint them.
I also received the new control panel and cable. That prompted me to remove the old Control panel and cable. I will have to enlarge the current opening to fit in the new panel so another trip with all of my implements of destruction will be in order.
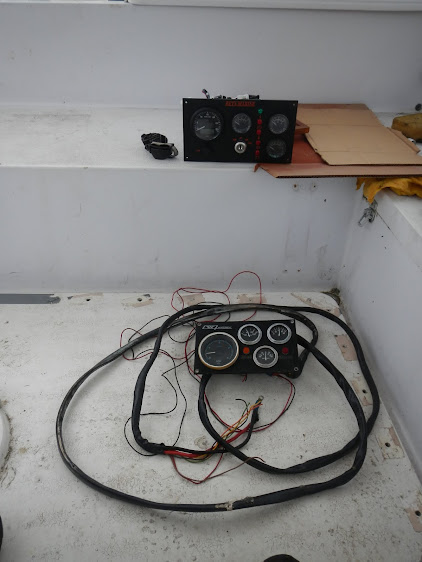
The new panel above with the old panel below.
I anticipate another go this weekend. Shawn isn’t too keen on lugging around the engine in the back of his truck and I would like to have the engine in place so that I can start to place the raw water strainers, fuel filters and control cables. We still haven’t figured out exactly how best to approach dropping the engine into the room but you can be sure I will have photos.