Ah, the day we celebrate our freedom from our British Overlords. July 4th; the day when families get together and have big barbecues, go out on the water, swim and play and watch the fireworks together. Boat owners go places. Some people do cruises. We hope you are doing all of that stuff because we aren’t. And actually, that’s just fine with us, even though this is the first time in many years that we have actually been home on the 4th of July. We are usually out cruising, usually in Canada. We are at the dock this holiday weekend, happy to have some time to knock off a few projects. There is a lot going on down at Galapagos and it feels pretty good.

Having a double anchor roller allowed us to secure one anchor and use the other roller to deploy chain into the trashcan.
Yesterday we spent the day at the marina working on our projects at the bow. First we removed the anchor chain. We want to inspect it and have it regalvanized. There is one small area on the chain that gives us pause, as in we are not sure if it’s okay or not. Since our boat depends on having good chain, we’ll be looking closely at that small area. Fortunately, it’s near one end of the chain, so if we have to cut it off, we haven’t lost too much. Most of the chain is in really great condition.
To remove the chain, we rented a big furniture dolly, strapped a plastic garbage can to it, and then dropped the chain into it. Now we’re driving it around in our almost dying truck until we can get it up to Ballard to Emerald Galvanizing. (Hey local peeps, if you know someplace else, give us a holler.) We waited until high tide, rolled her up the ramp, then transferred the chain to another container in the back of the truck. (Seriously, it would not surprise me if that truck just up and died the day before we leave. I only hope it holds out that long.)
Our other agenda was to remove our Lofrans Falkon windlass so Mike could open it up and inspect everything, looking at brushes, and generally maintaining and putting his hands on each piece of it because that’s how he rolls. The windlass has worked perfectly, but he has already repaired one of the switches once, and we would rather make sure that everything is in good shape before we leave.
For those readers unfamiliar with boating terms, the windlass is what we use to drop the anchor and retrieve it. We have an electric windlass on board Galapagos, and we carry 300 feet of chain. To deploy the anchor, we step on a foot switch and the windlass begins rolling the chain out, the weight of the anchor keeping it moving. To bring the anchor in, we step on the other switch, bringing up a little at a time. This is a critical piece of equipment on board the boat. Our lives could depend on a reliable windlass and anchor so we don’t cut corners on this stuff.
Getting the windlass off was difficult, mostly because it was so well installed in the first place. After Mike removed all the bolts and pried away at the seal as much as he could, we used the main halyard to exert constant pressure on the caulk so it would gently pull away. A little more pressure, then waiting. Then a little more, then waiting. Then a little more, until it finally gave way.
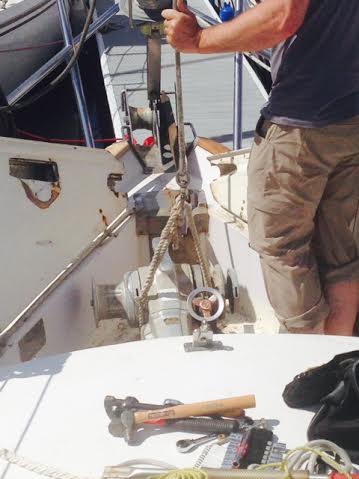
Keeping tension to gently pull away from the caulk.
When we pulled it up, there was some interesting looking white stuff that appeared to be used to fill a void underneath the windlass. We just don’t know what this stuff is. (Hey Derek, if you are reading this, do you know what this stuff is?) Any ideas out there in blog reader land? It has the consistency of that white paste kids use in school, the kind everyone secretly eats while the teacher makes gagging noises. There is almost no odor and (yeah, we went there) almost no taste. It is not greasy. Poking it with a finger and rubbing fingers together, it begins to dry out and then flake off the skin. Someone suggested it might be White Lead paste. Mike thinks it is corrosion, but I hope he is wrong and I wonder why, if it’s corrosion, it would be pasty and not dry and powdery?

This white pasty stuff was under a rectangular void area on the windlass.

This is the rectangular void with some of the paste clinging to it. Sorry for the photo quality. My camera is in being cleaned so all I have is my phone.
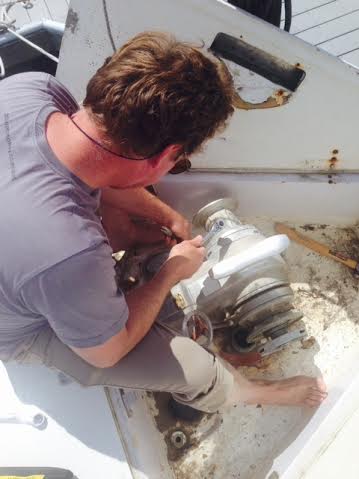
So you probably notice in the photos that the windlass locker has also seen better days. It’s been on my list to clean this space up, repair a rotted area of wood by the foot switches, and give it a fresh coat of paint. That is going to be happening. I have a nifty wood rot epoxy that I’ll be using to repair the small area that needs it. We also have some fiberglass supplies if we decide to lay a few sheets of that in addition to the epoxy. I’ll report back when we see how it works. The rot is close to one of the foot switches which we’ll be inspecting and replacing as necessary.

You can see the foot switches to the left of my foot. The area in question is between them. That brown area is wood that is not covered with fiberglass for some reason.
We brought the windlass home, still taking advantage of a larger work space when we can get it. Mike couldn’t wait to take it apart and have his version of a good time. Andrew was home, so there was a little father/son machine and tool bonding time. He’s pretty impressed with the condition, and has plans to make it even better, which I will let him write about.
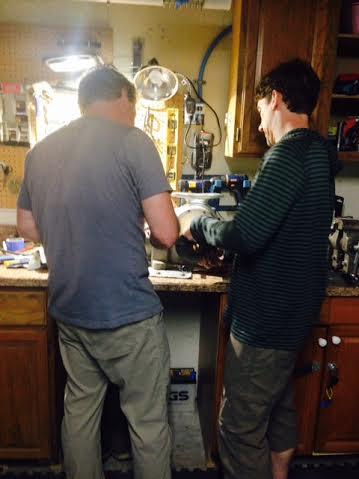
I do cherish scenes like this.
There are other fun things going on, but that’s all for now. Adios, amigos!


