Raise your hand if you thought we would have some trouble with that exhaust set up on Galapagos during our recent shake down trip from Astoria, Oregon to Tacoma. Yeah, don’t gloat. Because our hands are raised, too. If you’ve been following the Drama of the Exhaust System, you’ll recall that we had a fancy new engine exhaust pipe made to fit the boat because we were worried that water would back up into the engine, drowning Hiram and making us dead sad. If you are new to this series, read about that here and here to catch up with the rest of us.
The new pipe fit like it was made for Galapagos because, duh, it WAS made for Galapagos to the tune of (Put coffee mug down here) an amount of money that is very large. When you pay several hundred dollars for a specially machined piece, you kind of think things would be right but that’s where you would be wrong.

Freshly installed and wrapped. This tape turned out to be really good.
From the get go, Mike was concerned about the weld holding the new piece of metal pipe to the flange that was used to attach the thing to the Beta. It just didn’t seem that the piece had enough support to keep that particular joint intact but the mechanic who fashioned the piece assured us that it would be fine. We wanted to believe him because we really were anxious to turn the page on that chapter of the refit. The pipe was pretty. It fit nicely. The kid who made it was a nice kid. Hiram hummed along perfectly well. Mike added rubber washers to the support on the right, wrapped the thing in insulating tape, and vowed to keep his critical eye on it. We figured it would eventually be a problem but we wanted to get going bringing Galapagos up to Tacoma. What could possibly go wrong?
All was well until we were anchored in Bellingham Bay ready to visit our son Andrew for a couple of days. Mike had been doing his usual checks in the engine room and I could tell by the cut of his jib something was amiss. Then the cursing began. It’s always quiet, but it sounds even worse that way and after the time he found water in our new engine’s oil, whenever I hear silent cursing coming from the engine room, I have a post traumatic experience. He found that the weld had separated just where he’d been concerned it would, and what was holding the pipe together was the insulating tape. And because of the leak, the exhaust gases were now allowing water to make its way back toward the engine! Oy. When we examined the broken weld, we saw that the piece had been butt-welded, not beveled or supported in any way. Sheesh. Do we need to learn to weld in order to see that things are done right?

You can see the complete break in the middle of the photo. Ouch.
He removed the tape, which was black on the inside from engine exhaust. The pipe was in two separate pieces. Mike attempted a temporary fix using high temperature silicon tape but the gas pressure made that fix very temporary. There was nothing for it but to get the thing repaired. I held my breath as he checked the engine oil. No water. Praise the powers that be. Hiram was safe. Another bullet dodged; another withdrawal from the Kitty of Karma. We better start making some deposits there.
These are the times that try the souls of boat owners and we feel extremely lucky that this happened in Bellingham when we were safely anchored and had access to a car and services. Really, life was incredibly good just then and no stinking exhaust pipe was going to ruin our time. Mike thought we might be stuck in Bellingham with the exhaust system blues for a few days. I can think of worse places to be. Andrew rescued us with his car and he and Mike carefully rowed the piece to shore. 
Mike took the piece to a place he had called (thank you, Iphone), and they referred him to someone else, etc. By the following day he had located Chad Peterson of Peterson’s Welding and Fabrication. After consulting with Chad (our new best friend) we left the parts with him and spent our waiting time purchasing aluminum stock and doing some other fun things we’ll write about later. It was a good day, one that made us look forward to being retired and having time to just go with the flow.
Mike planned to use the aluminum stock to make new support struts and called our loyal mechanic, Shawn, who had also been a little concerned with the exhaust pipe installation. Thankfully he is very responsive at picking up the phone when Mike calls. You’d think he’d be tired of hearing from us by now. He had some good ideas to add to Mike’s good ideas and a plan was formed.
Shawn maintained that the pipe needed to vibrate in time with the engine vibration and therefore needed to be supported by struts that were attached to the engine. That made sense to us. Hell, what do we know? So in addition to beveling and welding the pipe, Michael asked Chad to add a cross brace with holes in it to create a more stable geometric form that would also provide landing points for the new support struts. That way the pipe and the engine could both sing the same song.

In deep mano a mano consultation with Chad. The amount of testosterone in this workshop was mind boggling. I had to get some fresh air.
A few hours later we picked up the newly welded piece. This time the two parts were beveled to allow a greater amount of surface area to be welded. We can only hope. It all looked great (just like it did last time… just saying) so we paid Chad less than I thought it would be and returned to the boat. These kinds of things are why I still work.

Mike tests the tensile strength of the finished piece. He is pleased.

Installed and ready for new supports. There is so much more structural integrity just with the crosspiece added. Geometry, people. Geometry. Live and learn.
Back at the man cave aboard Galapagos Mike created two support struts for this piece of metal art we call an exhaust ‘elbow’ and found places to attach them to the engine. We had picked up some aluminum flat and angled stock while waiting for Chad to work his magic. Without shore power, Mike was limited in how much actual cutting and drilling he could do to build the struts and aluminum is much easier to work with than steel. He also decided that he would leave the insulating tape for later so he could keep a close eye on the thing. A very close eye.
We left that afternoon and spent a lovely evening at little Eliza Island, just an hour from Bellingham. Everything was holding thus far. We know this because every time I looked up Mike had his head in that engine room, gimlet eye focused narrowly on Hiram’s elbow.

Two supports. Notice one is a flat piece and one is an angled piece. There will be a test on this information later.
The following day we had a long motorboat ride with some minor sailing down Rosario Strait. The pipe had plenty of opportunity to break if it was going to do so right away. All went well and we pulled into Griffon Bay to spend the evening, planning to cross the strait the following day.
I’d like to say that this was the end of the story, but alas, our karma doesn’t work like that in this instance. This sentence is what is known, in literary terms as ‘foreshadowing’, a term which, as used here, means ‘giving a broad hint about things to come’.
We had a lovely sail across the strait the next morning, ending up amazed at how much distance this boat can travel in a day compared to Moonrise and how it can do 12 knots around Wilson Point and never even think about surfing. Speed demons! We motored some, but sailed more and still had record speed in the crossing, for us. We made it to the south end of Whidbey Island before anchoring for the night in the currents of Useless Bay.

Anchored in Useless Bay.
We had more sailing on the final leg of the trip. In all, we sailed a good part of this trip from Astoria to home. Even so, one of the supports turned out to be a sacrificial piece. The day after we pulled into our slip at Foss Harbor, Mike was doing his thing checking all things Hiram in the engine room. I heard that small little cursing I’m beginning to know so well. 
Oh yeah. The flat piece of stock sacrificed itself on the alter of vibration for the sins of the exhaust elbow. It took the load and the load broke its back. Pause for that moment of silence.
We have some more ideas about how to solve this problem but we want another pair of eyes to take a look so Mike will be busy finding someone in the Tacoma area who can give us another opinion. Looking at the system as it’s set up, it seems to us that on the right (in the photos) the rubber piece that connects the pipe to the water muffler serves to absorb the shock of the vibration. There is no such piece on the left, and this is too bad. Even if the thing vibrates in time with the engine, there is too much vibration for it to hold for long.
My idea was to have the thing cut into two pieces again, take part of the rigid pipe out, and insert a rubber piece on the left side. That would surely absorb the vibration on that side. Mike says that’s not an appropriate place for a piece of rubber. I believe him because, again, what do I know? But surely there is an equivalent piece in the world of metals? He says there is. So our current thinking is along those lines. At any rate, now that the engine has some hours on it (82 to be exact) Mike wants to have the alignment rechecked by yet another diesel mechanic. At that point we can discuss the elbow and see if we can somehow design a system that will let us sleep at night.
So for now, we take it easy with the engine until we can get this issue resolved, again. That’s okay. It just encourages us to raise the sails.

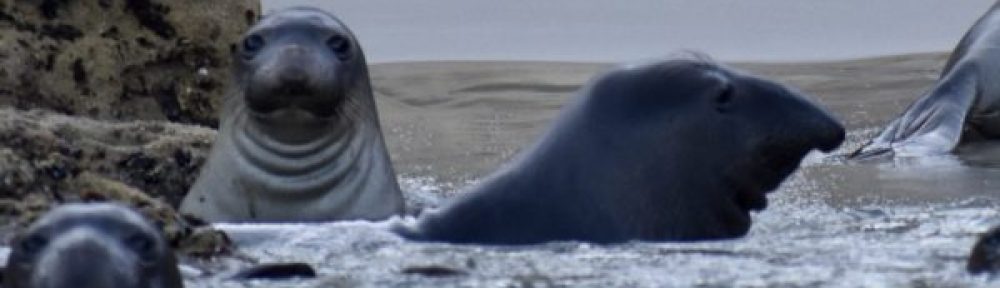
This makes it all worthwhile.